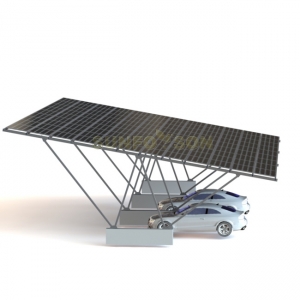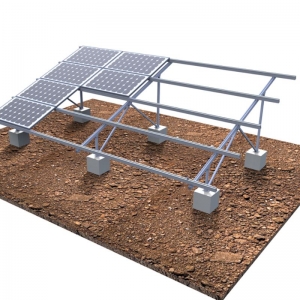
First of all, we need to know the structure of the solar carport. The following figure show the position and appearance of specific parts in the structure. This part needs to be checked carefully to facilitate subsequent installation and avoid errors during installation.

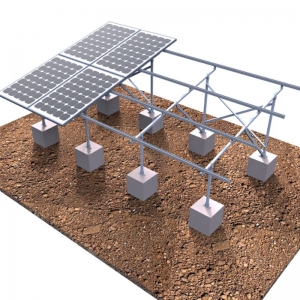
First of all, you need to make the cement pier strictly according to the space marked on the technician's drawing when you buy it. For different soil conditions, the cement based production will consult local civil engineers to meet different wind resistance requirements.
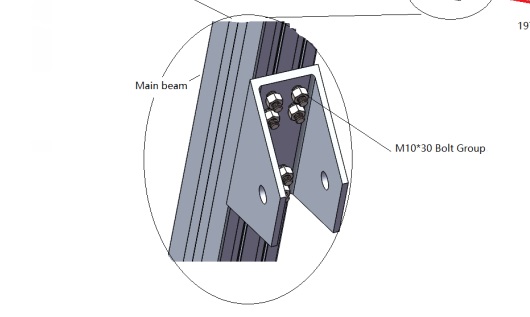
In the first step of installation, install the main beam with bolts, nuts and spring flat washers, fix the feet, and mark the installation position line on the main beam with a marking pen.
Then install the tube leg, put the major structure on the concrete blocks, and make the Foundation Bolt through the Fix Feet. Lock the Nut and Finished the Major Structure installation.In this way, the side support body of the solar car shed is assembled.

Third step, assemble the main structure of the solar bracket - the rail. When the rail length is not enough, you need to use the rail connector. Put the half of the Rail Connector to the Rail and use four Tapping Screw to fix. Install the next Rail to the other half rail connector, fix by another four Tapping Screw.
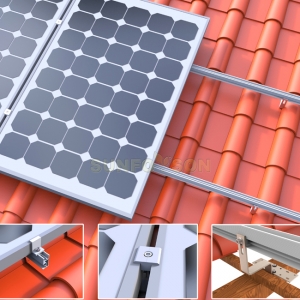
Four step, install solar panel. Firstly, install the end clamp in the rails. Then install the Solar Panel with the Mid-Clamp.Input the next solar panel as follow,and lock the mid-clamp.
Finial, input the next Solar panel as follow,and lock the mid-clamp.