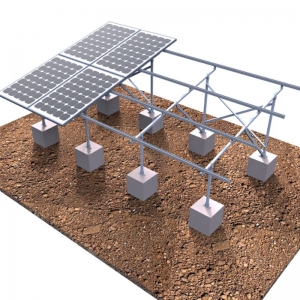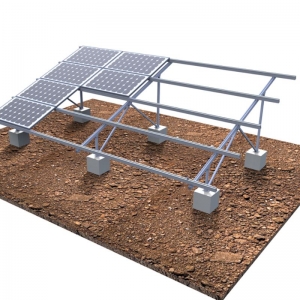

1.Brief introduction:
The G4S floating solar mounting system is designed for water photovoltaic power plants,applied for ponds, lakes, reservoirs,etc. It can greatly save land resources and will not have too much impact on the aquatic environment. It would have the high power generation efficiency because the wide water surface can effectively prevent the shadow from restricting the power generated by the photovoltaic module, and at the same time, the illumination area would always be even and much longer.
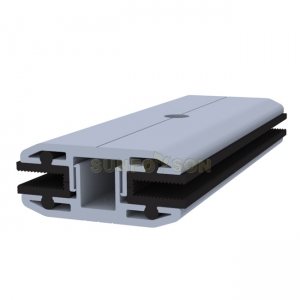
2.Main compenents:

3.SunRack Solar Floating Mounting Structure advantage:
1) maximize space utilization design;
2) unique bracket design, easy to install;
3) flexible design, suitable for the solar module with 60 cells and 72 cells mostly used in the market;
4)the parts are made of high quality HDPE to ensure the performance of the materials;
5)carry out quality control on food-grade materials to ensure no toxic pollutants released;
6)easy to install without any heavy equirments;
7)rigid and peripheral double-row walkway design to make walking on water be flat and safer;
4.SunRack Floating Solar Mounting Support installation process:
1)Mounting support legs: Place the main floating body on the floor, and then assemble the supporting legs to it. Should pay attention to the installation direction (tools would be offered)
2)Fixing fixture: fix the aluminum alloy clamp to the support leg (the clamp opening should be leaved with 2mm to clip the solar panel, and its direction should be outward)
3)Connect the two main floating bodies: use one aisle to connect the two main bodies together and lock them with bolts and nuts. Pay attention to the orientation of the mouth of the floating body and the stacking order of the floating ear plates.
4)Install the outer aisle: Pay attention to the stacking order of the floating ear plates when assembling the aisles,avoiding the warpage of the assembled rear array.
5) Install the fasteners: the bolts and nuts, the clevis pin 1, 2 & 3 should be inserted into the corresponding positions in below figures shown. The ear plate gap needs to be padded. Insert the pins in place and use a special tool to rotate the pin with 45° to make it fix well.